|
Adding art to each day can be one of the simplest and most beautiful ways to help order the affections of our children. We all know that there are so many benefits to giving our children the opportunity to express themselves with art. Being creative and encouraging creativity each day is a wonderful thing. When we give our children time to create, we are, in a way, celebrating God's creativity. God is the ultimate creator, and we were made in his image. So we should place a very high value on creativity and art. 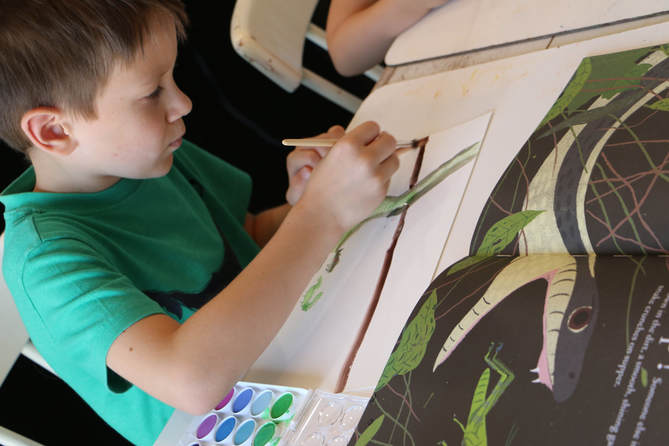 Painting with Watercolors 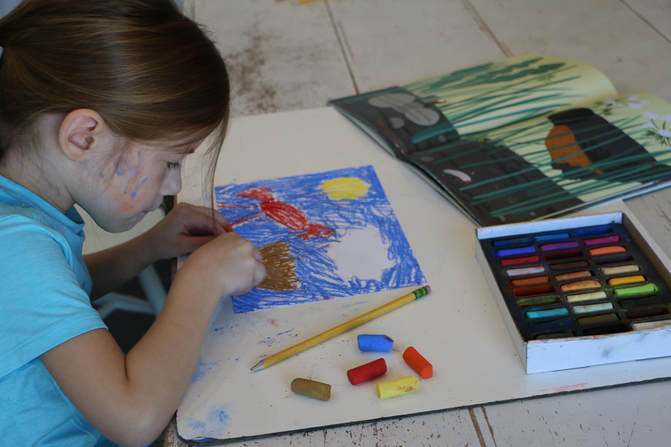 Drawing with Chalk Pastels But how can we do art each day when we have so many other subjects to teach our children? Our days get full so quickly! Plus, art often seems so time consuming and messy. What can we do about that? Let's take a look at three practices that can help us make art simple, doable, and not so messy, so that we can celebrate creativity each day... 1, Incorporate art into the lessons you are already doing. 2. Stick to a few favorites. 3. Simplify your art materials. 1. Incorporate art into the lessons you are already doing. Do art while you read aloud. During Morning Time, I read aloud from a classic book to my children. They do art as they listen. They use a blank unlined book, we call it their "literature lesson book", to draw or paint a picture to go along with the story. Each time we read, they add a new entry to their literature lesson book or continue work on a previous entry. The one rule we follow during this time is that their artwork must go along with the book we are currently reading. They draw pictures of what is happening in the story, the setting, the characters, or a favorite part. Sometimes the older ones like to add their writing or labels to their pictures but they are not required to do so during this time. We do include the title of book on the first entry. At the end of each year, we have a literature lesson book filled with their art that also acts as a record of our reading. We include art into our history and science lessons every day. Our history and science lessons follow the same order or pattern each day. It is the ancient honey making metaphor. 1. Lectio- read, collect information or ideas 2. Meditatio- meditate, digest, think deeply, contemplate 3. Compositio- compose, create First, we read new material on the subject we are studying. Then we narrate back what we just read. I ask leading questions if necessary. I take the most important parts of our reading and narration and write it on the board in complete sentences. The younger ones copy the sentences in their blank unlined history or science lesson book while the older students add an extra sentence or two as I dictate it to them. Here is where the art comes in. Everyone draws a picture to illustrate the history or science sentences we just wrote. Not only are my children getting time every day to do art, to improve their drawing skills, to express themselves, and to be creative; they are learning by way of the order of our lessons that creation is a very important part of our learning. How you teach something is just as important as what you teach. When I give my children the time to create and draw, I am giving them time to take what they have just learned and think more deeply on it. I am giving them the time to create, the time to make it their own, and the time to make it a part of them. 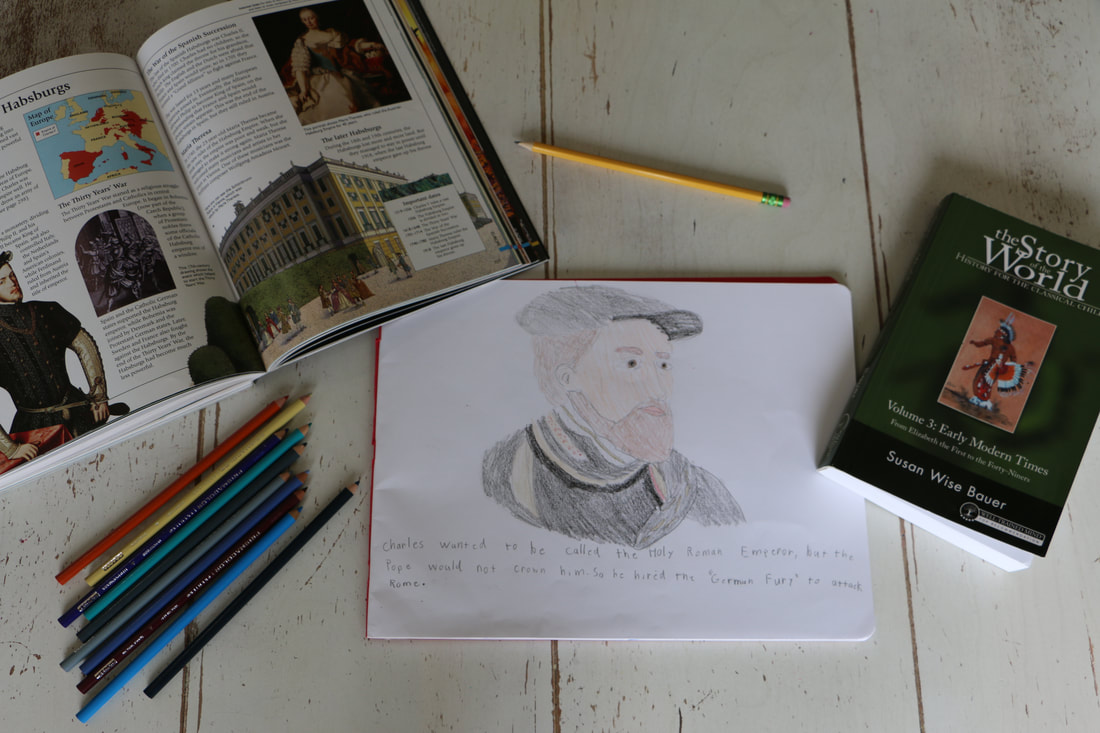 A Page in Audrey's History Lesson Book 2. Stick to a few favorites. It is a very daunting thought to think that we should have a fancy, sparkly, new art project to complete each day. When I first started homeschooling I thought I should be doing just that. I thought I needed to come up with an original, "never-done-before" art project to do every day of the week. Then I though I should make it "go with" what we were learning about. After all, there are so many fun ideas out there. But I just stressed myself out, trying to find the "most perfect" and "very best" art project to go with the Mayflower history lesson and the Africa geography lesson and the astronomy lesson about the phases of the moon. I had to find the idea, determine all the fancy art supplies I needed, then go out and purchase those supplies every weekend. I just could not keep up with that. Instead, I now have a few favorite art projects that we do again and again. All I have to do is change the subject of the art project. I do not have to change the form of the art project or the supplies. I simplify our art time by limiting the types of art we do to the "easier-to-prepare" and "easier-to-carry-out" types of art. So most of our art time is spent doing art that we are already familiar with, art that we have done many times before, but art that we really never tire of. I pick the art projects that are the "proven winners" with my children. All I do is change the subject of our art project, but not the art project itself. Here are some of our "proven winners":
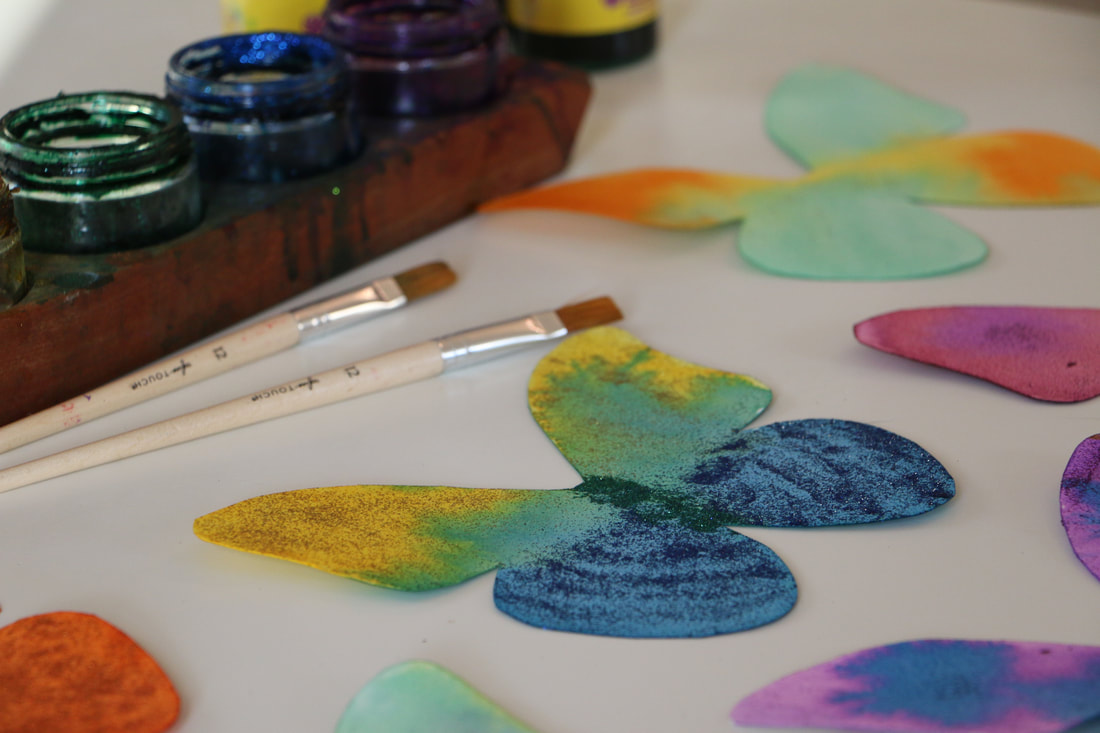 Watercolor Painted Butterflies using Colorations Glitter Watercolors 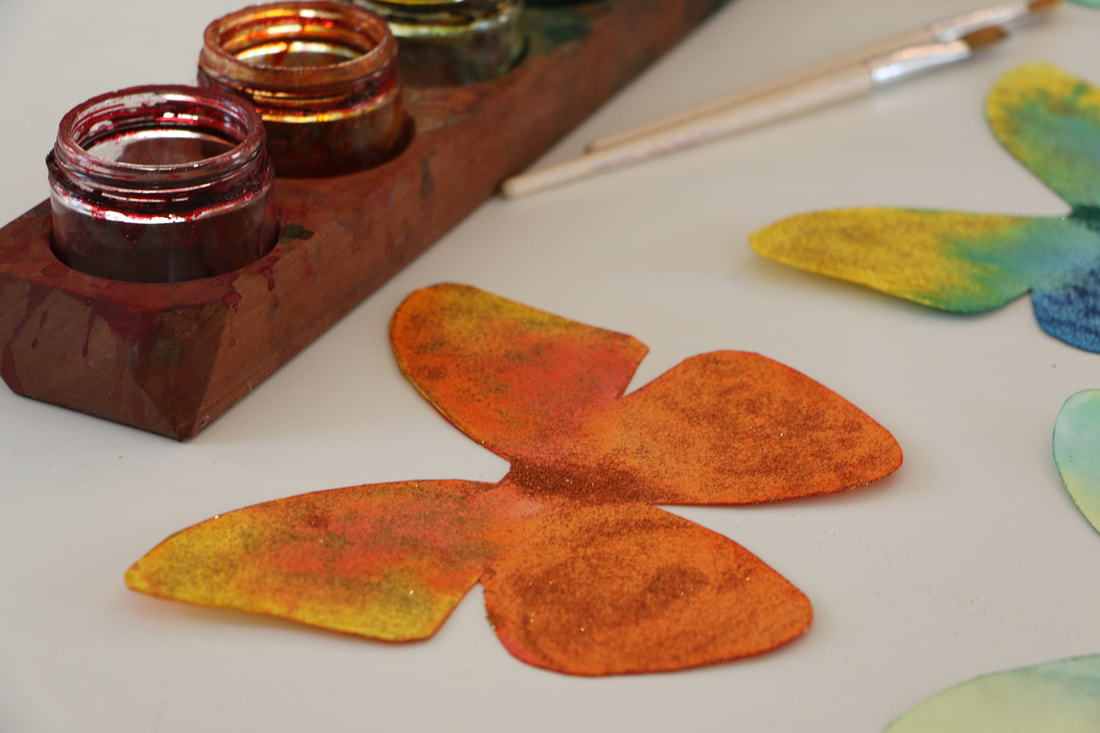 Such a Simple Art Project! Find a Shape You Like. Cut It Out. Paint! The Glitter is Already Included! 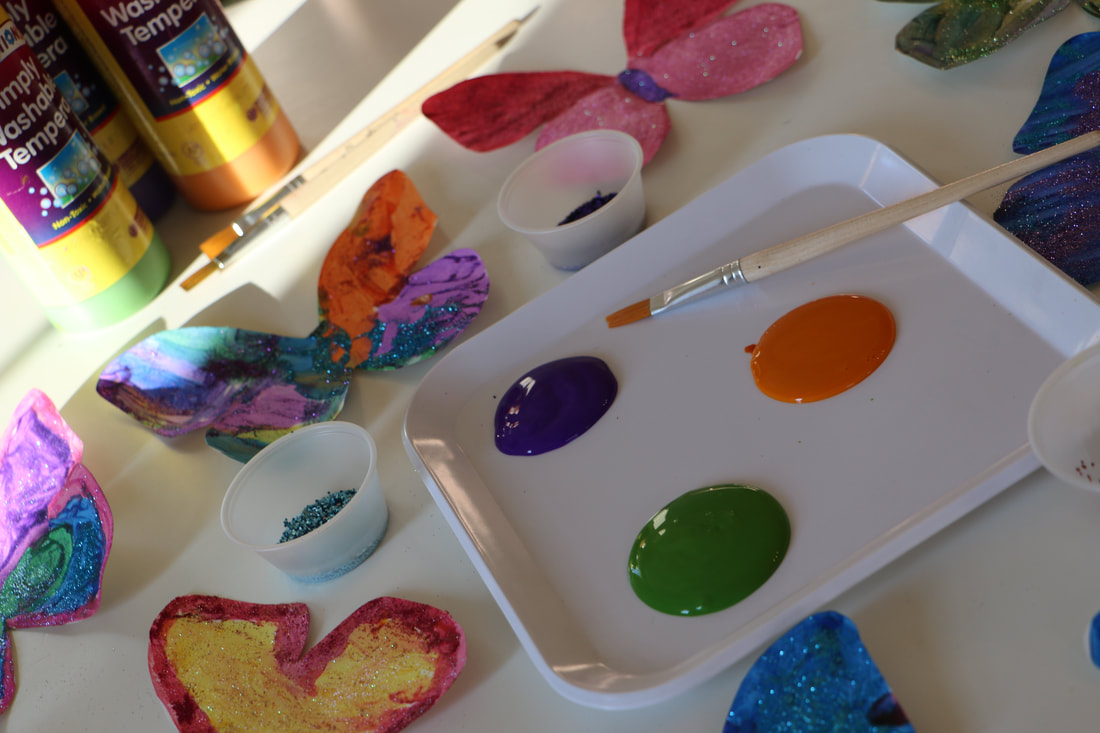 Tempera Paint and Glitter Butterflies using Colorations Tempera Paint 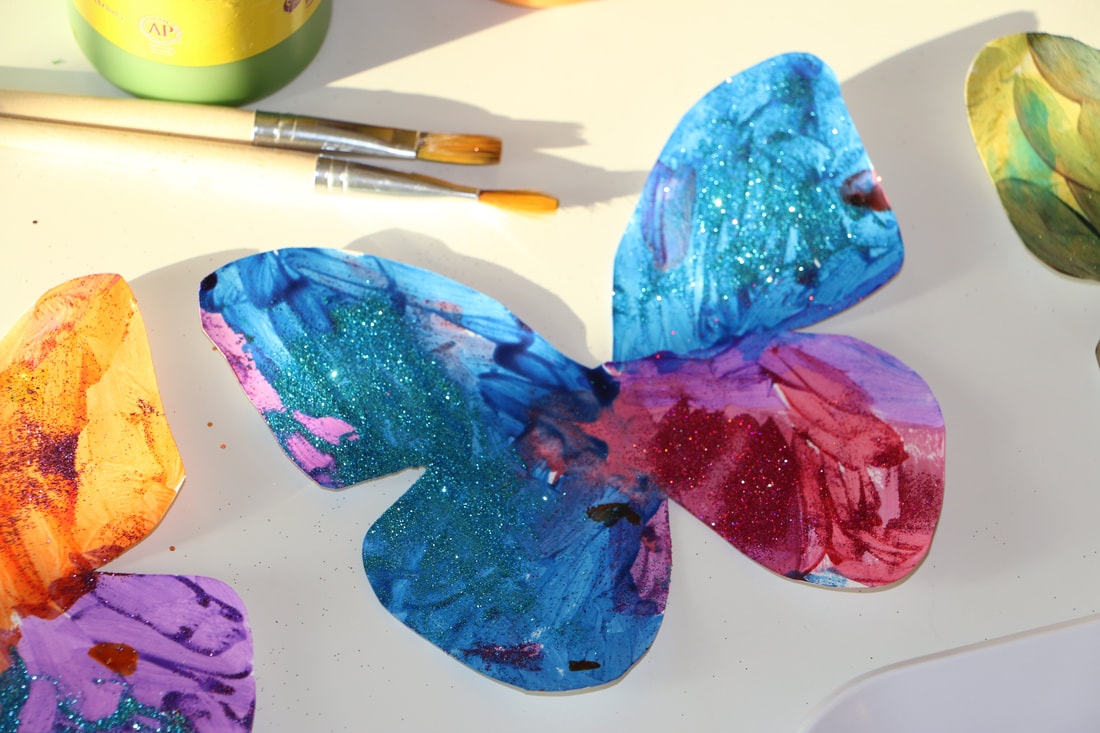 Such a Simple Art Project! Even My Youngest Artists Create Something Beautiful! 3. Simplify your art materials. It is easy to add art to each day when you have a few simple art materials always on hand. With just these few simple art materials, you can create endless amounts of artwork on any subject you are studying or celebrating. You could rotate through the kind of art materials you use each day. One day you can use colored pencils and the next day you could use chalk pastels. You can stock up on art supplies made specifically for children when your children are very young (Crayola is my favorite for little ones). When your children get a little older, I highly recommend investing in some artist-quality art materials. I believe as soon as seems fitting, we should be giving our children the best art materials that we can. When we give our children high quality art materials we are telling them that what they are doing is important and worth it. We are nourishing their sense of touch when they pick up their pastel or pencil and glide it along the paper. We are nourishing their sense of sight when we use beautiful art materials. By giving our children high quality art materials, we are giving them a true experience with beauty. The materials I am listing here are simple to get out, simple to use, and simple to clean up.
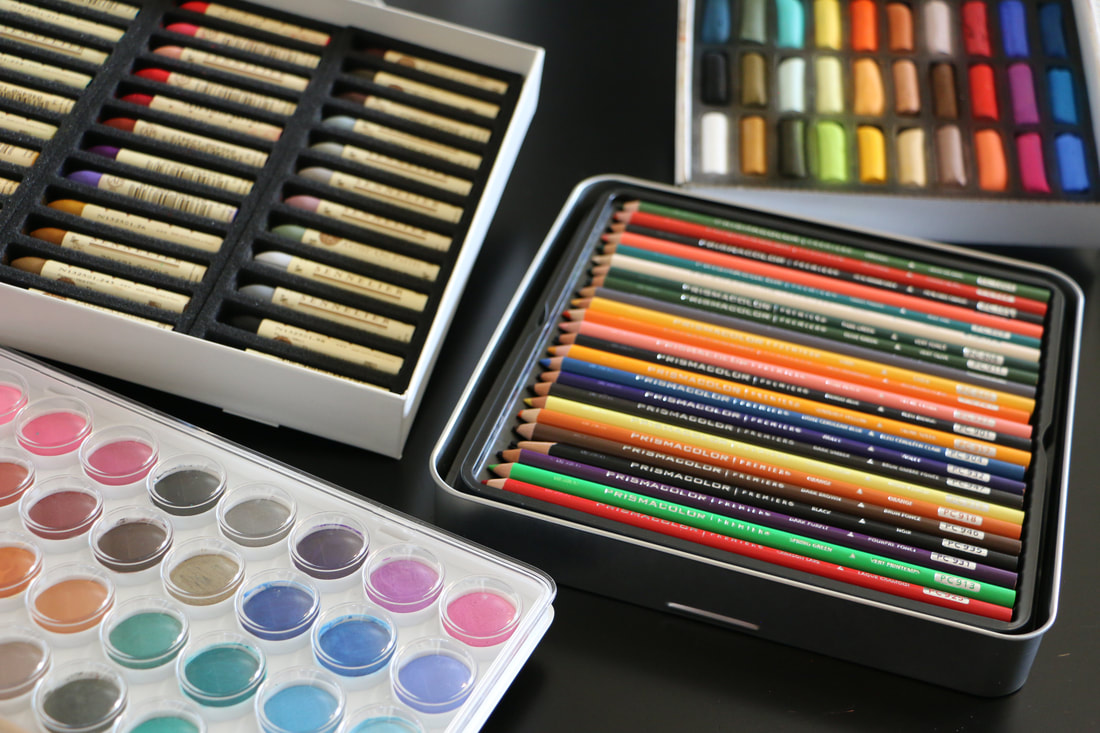
1 Comment
Lauren Vance
7/23/2018 08:37:04 pm
This is so helpful! Including art in our day is always such a struggle for me, but my daughters both love being creative. This article definitely gives me some ideas on how to do a better job incorporating art and creativity into our lessons. Thank you! Leave a Reply. |
AuthorHi, I'm Allison! Wife, mother to four sweet babies. Archives
March 2019
Categories |
 RSS Feed
